Buy Setup
Reference notes
01Pullback structure
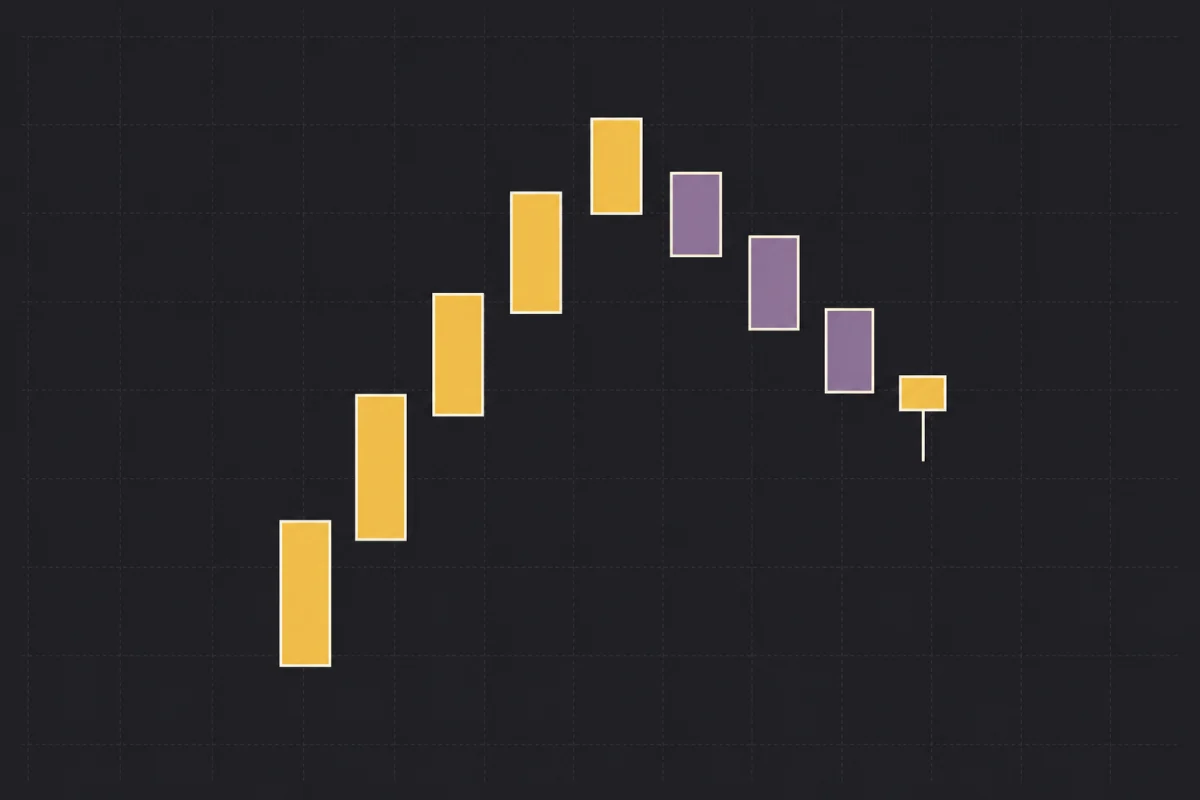
Look for a pullback of roughly 50% of the previous upward move.
Use a minimum of three lower-high candles, with each successive peak below the previous candle’s high.
Avoid a single oversized candle, a shallow two-bar pause, or choppy action that breaks prior highs before the setup is complete.
0220MA alignment
Price pulls into a rising 20-period moving average and begins to play off it.
A trigger far above the 20MA can mean the correction is not finished.
A drop too far below the 20MA suggests the move is failing rather than correcting cleanly.
03Variations
A correction can retrace the full prior move. Treat it as higher risk and wait for a secondary entry to confirm that the move is holding.
After an opening move or a large gap, price may bounce just above the average while the rising 20MA catches up.
A pullback can erase half the prior move in only three bars. It can remain viable if the pivot holds and the 20MA catches up.
Original sourceOriginal video source
Original video source
Pass the first signal. Trade the proof.
When the correction is unusually deep or fast, the first setup can be too aggressive. The second entry adds confirmation that the original trend is still holding.
Very deep pullback
The pullback gives back roughly the full prior push.
Let the first Buy Setup go. If price holds, wait for a fresh base and a second pivot sequence.- 01Pass
Skip the first Buy Setup
- 02Test
Let the pullback hold and build a base
- 03Align
Wait for the rising 20MA to catch up
- 04Confirm
Use the second bullish pivot sequence
The first signal was passed, so there is no position to manage.
The base and moving-average alignment provide the added confirmation.
- Entry
- Above the second bullish pivot
- Stop
- Below the second base / pivot low
- Target
- High of day